eezo App for PC - Download on Your Windows 7/8/10/11 & Mac
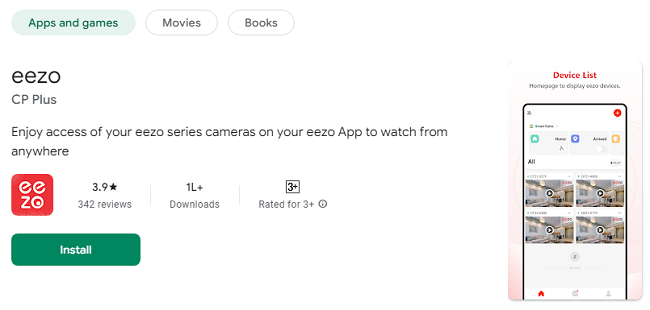
The eezo App has become one of the most popular apps for remote surveillance and home security, providing users with live video streaming, motion detection, AI alerts, two-way audio, and more, right at their fingertips. Initially designed for mobile devices like smartphones and tablets, the eezo App can now also be installed on PC (Windows and Mac), giving users the flexibility to manage and monitor their eezo Series cameras on larger screens.
In this detailed guide, we'll show you how to download and use the eezo App on both Windows and Mac devices. Whether you're looking to monitor your home, business, or loved ones, using the eezo App on your computer offers a broader view, enhanced control, and more convenient management of your security system.
Why Use the eezo App on PC?
While the eezo App is primarily designed for mobile devices, using it on a PC has several advantages:
Larger Screen: A PC offers a larger screen for live viewing and managing multiple cameras simultaneously, which is especially useful if you have several cameras set up.
Better Control: The keyboard and mouse provide more precision for managing settings, playback, and real-time monitoring.
Enhanced Multitasking: On a PC, you can multitask more effectively, checking security footage while working on other tasks.
Improved Performance: PC devices typically offer better processing power, meaning smoother video streaming and less buffering, especially when viewing high-definition video.
Now, let's walk you through the steps to get the eezo App on your PC, whether you're using Windows or Mac.
Download & Use eezo App on PC Windows
To use the eezo App on your Windows PC, you can either use an Android emulator or the Windows version of the app if available. Since the app isn't natively available for Windows (as of the last update), the best way to run it on your PC is via an emulator. Here’s a step-by-step guide to getting the app up and running.
Step 1: Install an Android Emulator
The most effective way to run the eezo App on Windows is by using an Android emulator. These emulators mimic the Android operating system on your PC, allowing you to download and run Android apps. The most popular emulators for Windows are:
BlueStacks
NoxPlayer
LDPlayer
For this guide, we’ll use BlueStacks, but the steps are very similar for other emulators.
Go to the BlueStacks website: Open your browser and go to BlueStacks Official Website.
Download BlueStacks: Click the "Download BlueStacks" button to get the installer file.
Install BlueStacks: Once the download is complete, open the installer file and follow the on-screen instructions to install BlueStacks on your Windows PC.
Launch BlueStacks: After installation, open the BlueStacks app.
Step 2: Sign in to Google Play Store
To download the eezo App on your Windows PC using BlueStacks, you'll need to sign in to your Google Play Store account.
Open BlueStacks and go to the Google Play Store.
Sign in with your Google account (the same one you use on your mobile device).
If you don’t have a Google account, you can easily create one by following the prompts.
Step 3: Download the eezo App
Now that you're signed in to the Play Store, you can search for the eezo App and install it just like you would on an Android smartphone.
In BlueStacks, click on the Google Play Store icon.
In the search bar, type “eezo App”.
Click on the eezo App in the search results.
Click the Install button to download and install the app on your PC.
Step 4: Launch and Set Up the eezo App
Once the eezo App is installed, you can launch it directly from BlueStacks.
Open BlueStacks and go to the "My Apps" tab.
Locate and click on the eezo App icon.
The app will open as if you were using it on an Android device.
Log in to your eezo account, or create a new account if you haven’t already.
Follow the setup instructions to connect your eezo Series cameras.
Step 5: Start Using the eezo App on PC Windows
Once the setup is complete, you can start using the eezo App to:
View live video feeds from your cameras.
Review recorded footage and access playback.
Receive motion alerts and interact with your cameras.
Control camera settings, including activating features like the siren or spotlight.
How to Download & Use eezo App on Your Mac?
For Mac users, the process of downloading and using the eezo App is very similar to that of Windows, but with a few slight differences. Like Windows, the eezo App isn’t natively available for macOS, so you’ll need to use an Android emulator.
Step 1: Install an Android Emulator for Mac
To use the eezo App on a Mac, you need to install an Android emulator. The most recommended emulators for macOS are:
BlueStacks
NoxPlayer
We will focus on BlueStacks for this guide.
Go to the BlueStacks website: Open your browser and visit BlueStacks Official Website.
Download BlueStacks for Mac: Click the "Download BlueStacks for Mac" button to get the installer.
Install BlueStacks: After downloading the installer file, open it and follow the on-screen instructions to install BlueStacks on your Mac.
Launch BlueStacks: Once installed, open the BlueStacks application.
Step 2: Sign in to the Google Play Store
You’ll need to log into the Google Play Store to download the eezo App.
Open BlueStacks and go to the Google Play Store.
Sign in using your Google account.
If you don't have a Google account, follow the steps to create one.
Step 3: Download the eezo App
In BlueStacks, go to the Google Play Store.
Type “eezo App” into the search bar.
Click on the eezo App in the search results and then click Install to download the app.
Step 4: Set Up the eezo App on Mac
After the installation process is complete:
Open BlueStacks and navigate to the "My Apps" tab.
Find and click on the eezo App icon.
The eezo App will open just as it would on an Android phone.
Log in or create a new account.
Follow the setup instructions to connect your eezo Series cameras.
Step 5: Start Using the eezo App on Mac
After setting up your account and connecting your cameras, you can now use the eezo App on your Mac to:
Monitor live feeds from your cameras.
Access recorded footage.
Get motion alerts and interact with the app via two-way audio.
Adjust camera settings, including triggering the built-in siren and spotlight features.
Benefits of Using the eezo App on PC
Using the eezo App on your PC (Windows or Mac) offers a host of benefits:
Larger Viewing Area: A bigger screen provides a clearer and more detailed view of your security footage.
Easier Navigation: With a mouse and keyboard, managing camera settings and interacting with the app becomes much easier than on a mobile device.
Improved Performance: PCs typically have more processing power than mobile devices, resulting in smoother video playback.
Multitasking: On a PC, you can run the eezo App alongside other applications, allowing you to monitor security while working.
Troubleshooting Tips for Using the eezo App on PC or Mac
If you encounter issues while using the eezo App on your PC or Mac, here are a few troubleshooting tips:
Ensure Stable Internet Connection: A poor internet connection can cause buffering issues during live streaming or playback.
Check Emulator Settings: If you're using an emulator, make sure it’s updated to the latest version. Some features may not work correctly with outdated emulators.
Restart the App: If the app freezes or crashes, restarting it may help.
Clear Cache: Sometimes, clearing the emulator’s cache can solve performance issues.
Reinstall the App: If you continue facing problems, try uninstalling and reinstalling the eezo App.
Conclusion
The eezo App offers an excellent way to enhance your security system with real-time video streaming, AI-powered alerts, and remote camera management. By installing the app on your PC (Windows or Mac) using an Android emulator, you can take advantage of a larger display, improved performance, and greater control over your security cameras.
Whether you're managing multiple cameras or simply want to monitor your home or office with more convenience, the eezo App on PC is a game-changer. Follow the steps above to get started and enjoy a smarter, more efficient security solution right from your computer.
Trending Now
Updates